Invite teammates, choose their workspace and team roles, and check whether they have joined.
Workspace Owners and Admins manage invitations in Settings → People. If you manage several workspaces, use Switch workspace in the top-left team menu first.
Invite the first group
- Open Settings → People.
- Choose Invite people.
- Enter one or more email addresses. Press Enter or use a comma between addresses.
- Review the access summary. The default gives each person workspace access and places them in the default team.
- Choose Change only when the group needs a different workspace role, team, or team role.
- Choose Send invitation. When you entered more than one address, the button shows the invitation count.
Invite people together when they need the same access. Start another invitation when someone needs a different role or team. You do not need to create teams before inviting the first group; every workspace already has a default team.
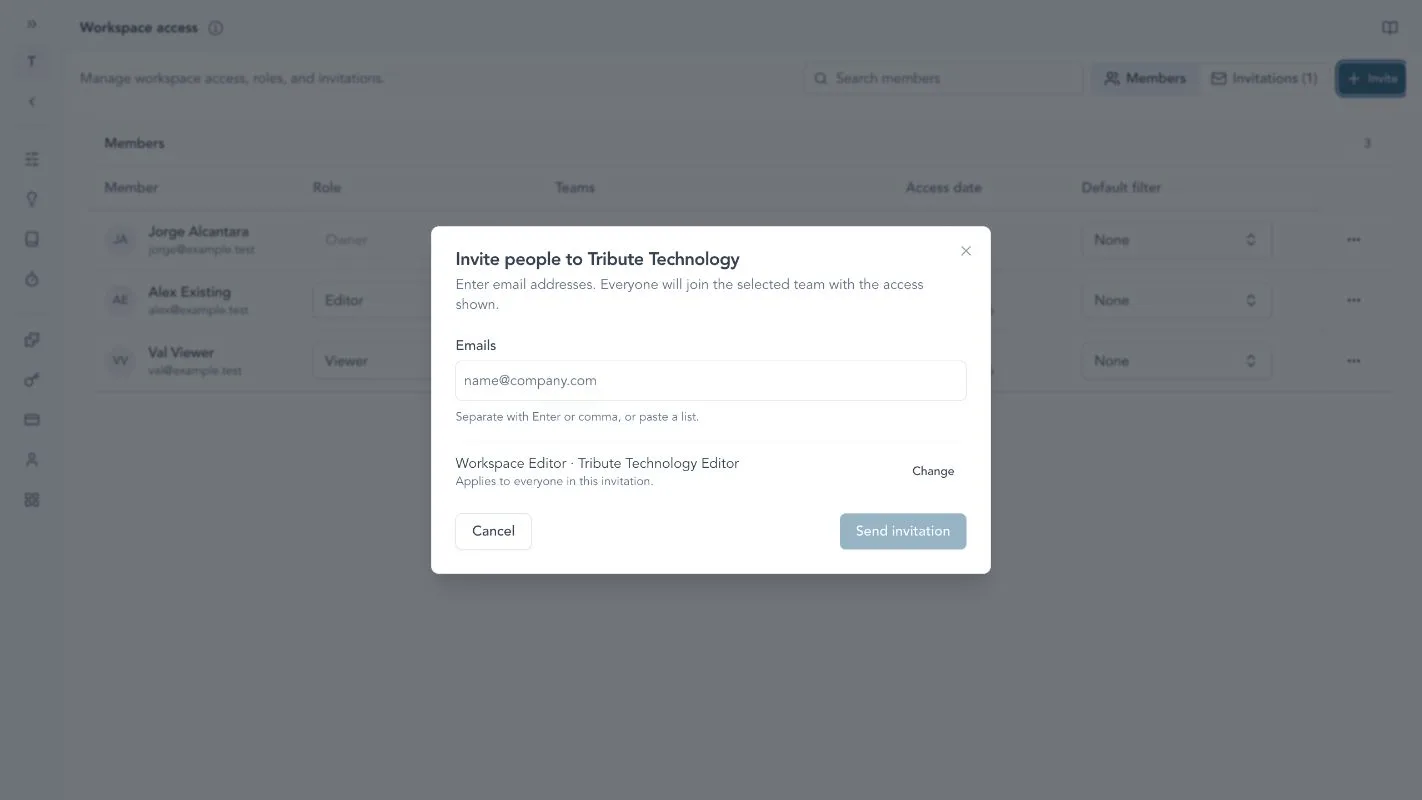
Invite the first group together. Review the workspace and team access summary, and choose Change only when the group needs a different assignment.
Choose the access each person needs
Workspace access and team access have different jobs.
| Access | Controls | Common choice |
|---|---|---|
| Workspace role | Workspace-wide administration or participation | Editor for people who create and update product work; Viewer for read-only participation |
| Team role | What the person can do inside one team | Editor for contributors; Viewer for read-only team access; Admin for the person who manages that team |
Use Owner and Workspace Admin only for people who must manage workspace-wide settings. A Team Admin can manage one team, but does not receive workspace administration access.
For the complete role model and team-owned work behavior, see Teams and team access.
Review members and pending invitations
After you send invitations, open the Invitations view. Each invitation stays there until it is accepted or revoked.
Use the table to check:
- the invited email address
- the intended workspace and team access
- whether delivery is pending or failed
- when the invitation was sent and when it expires
Use the row menu to resend, copy the invite link, or revoke an invitation. Check the recorded state before sending a second invitation to the same address.
Accepted invitations move to the Members view. The member row shows the person, workspace role, team assignments, and joined date. Search applies only to the view you have open.
Change or remove access safely
Use the Members tab to change a workspace role or remove a person from the workspace. Use the Teams tab to change membership or roles for one team.
Before removing workspace access:
- confirm the person and workspace
- transfer any product ownership or operating responsibility
- check integrations, API keys, or automations they own
- remove the membership
- rotate credentials they could access when required
Removing someone from one team does not remove their workspace access or their membership in other teams. Every workspace member must keep at least one team assignment.
Choose the right administration page
Use People → Members for workspace roles and invitations, People → Teams for team membership, and Workspaces for workspace names and defaults. Only Owners can create another workspace.
For billing, API keys, and offboarding, see Workspace administration.
Troubleshooting
The invitation has not arrived
Open the Invitations view and check its delivery state. Confirm the address, resend a valid invitation, or copy its invite link. Revoke an incorrect invitation before creating another one.
The person joined the wrong team
Open Settings → People → Teams. Add the person to the correct team before removing their last current team.
A role or access control is missing
The Members tab is restricted to workspace Owners and Admins. A Team Admin can manage that team’s details but cannot manage workspace-wide access.
Continue from here
Related guides
Did this guide answer your question?
Your response helps us prioritize missing or unclear documentation.
Still stuck?
Send your question to Zentrik support. This guide will be included automatically.